For years I have been searching for the the right HDR program, the right combination of sliders, the perfect preset that would work magic with my bracketed RAW captures and spit out an image that matched what I had in mind when I was setting up my tripod. But every time the final image failed to live up to my expectations. The detail was fabulous, the colours were beautiful, the tones being pulled from deep shadows and blown out highlights were incredible. But my images never seemed to work as a whole.
It turns out that was the problem. I was expecting everything to be ‘right’ in just one step. Once I saw the Photoshop layer stacks produced by some of the masters of HDR like Trey Ratcliff and Elia Locardi I realized that tone mapping was just the beginning. What follows is a step by step example of how to build an HDR layer stack in Photoshop.
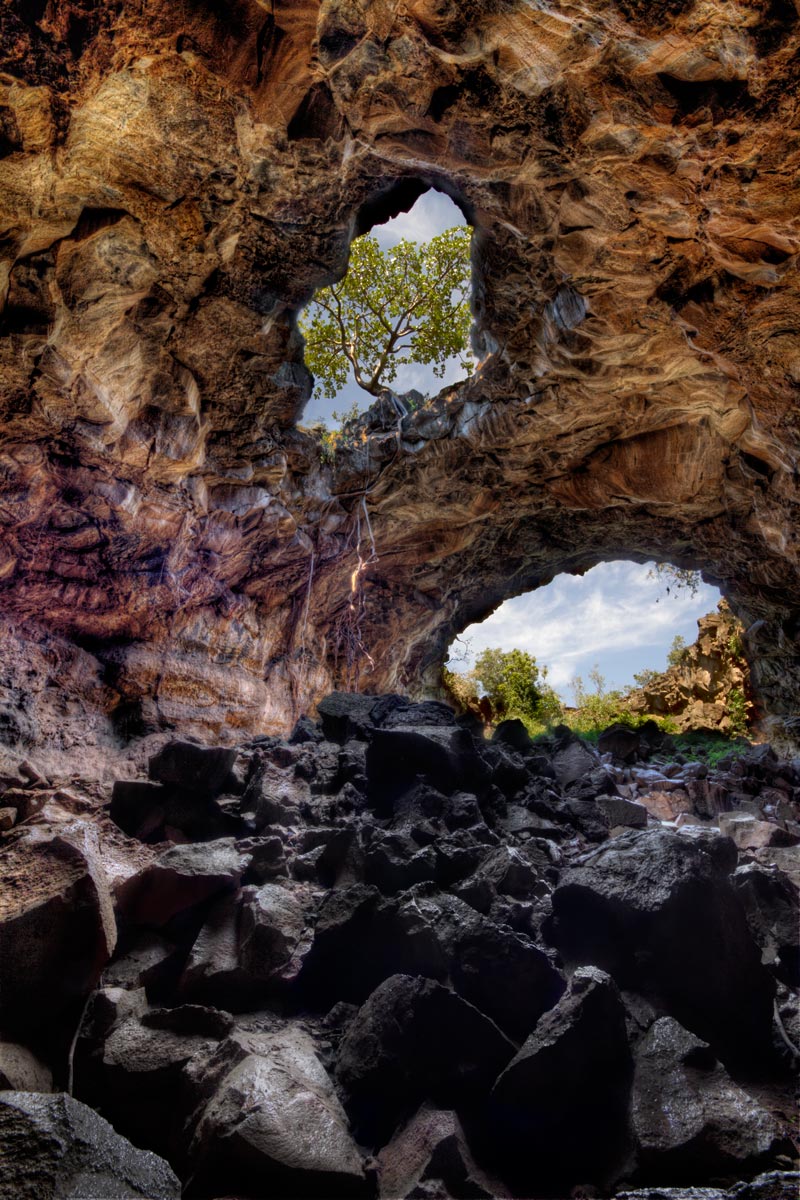
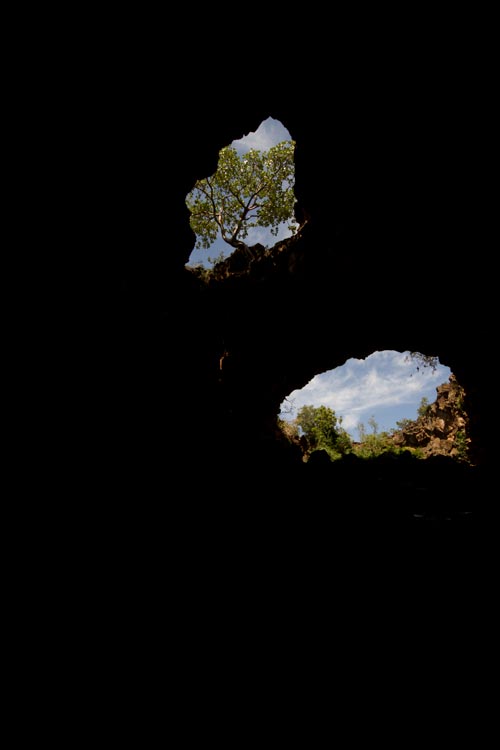
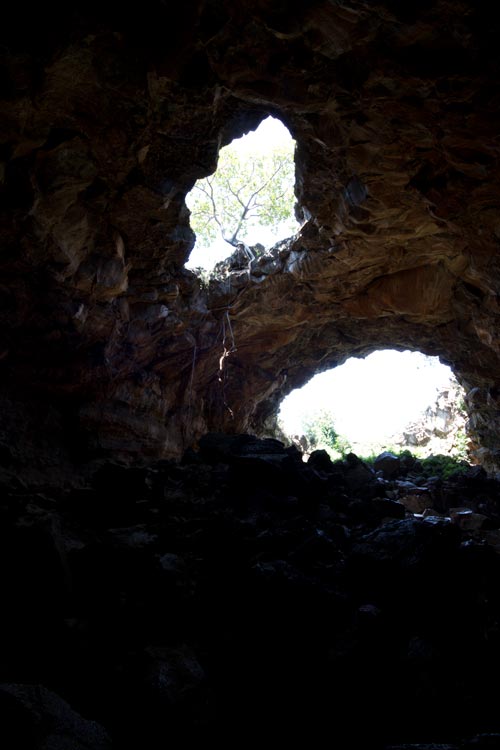
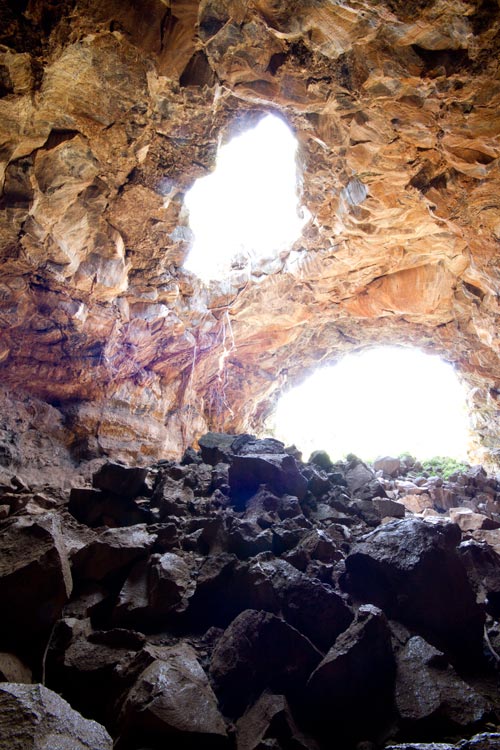
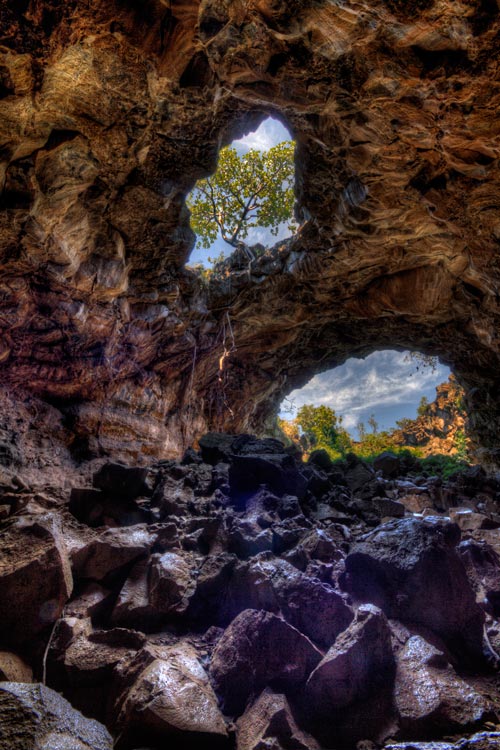
Nothing will push the limits of high dynamic range photography like shooting from the inside of a lava chute on the side of a volcano out into the equatorial sunshine at 8,000 feet above sea level. The sky was about 12 stops brighter than the rocks in the cave. I took three manually bracketed exposures at f/16, ISO 100, Canon EOS 7d, 10mm lens.
This is interesting, but certainly nothing like what I saw when I was there. The interior walls look pretty good. The rocks in the foreground seem good except for the erie purple lens flare running down the middle. The area outside the cave is where the whole thing falls apart. Bizarre blue skies that don’t quite extend all the way to the edge of the cave openings, garish rocks, and radiation green plants make me want to stay inside the cave and never leave. Obviously this tone-mapped image needs some help from Photoshop.
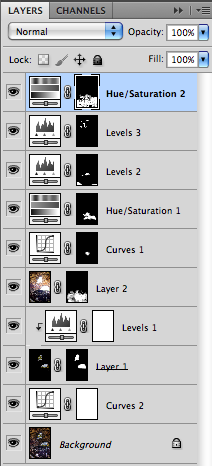
Here is how I built up the layer stack in Photoshop (starting from the bottom and working upwards).
- The first step was to brighten the the entire image. Just because it is a cave does not mean it has to look dingy. A curves adjustment layer looked after that.
- Next priority was to replace the tone-mapped exterior with the perfectly good exposure that I exposed by metering off the sky. I dragged that image (RAW converted to TIF in Adobe Camera Raw) on to the tone-mapped image (while holding SHIFT to ensure the layers were aligned). I then ALT-Clicked on the new layer mask icon to create a black mask which I then proceeded to punch holes in to allow the natural looking exterior to show through.
- The exterior looked a little too dark when compared to the interior of the cave, and the the clouds looked gray. A levels adjustment layer restored the white point of the clouds to pure white. Much better already.
- Now it was time to replace the purple glowing rocks with the more neutral rocks from the cave interior exposure. A layer mask was used to paint in the neutral rocks over the purple rocks.
- There was still a hot spot from the lens flare so a curves adjustment layer was used to darken that down.
- Since the rocks were backlit, it would be logical for the sides of the rock facing the camera to be pretty much black. An image needs some black to anchor it anyways. A new black point was set on yet another adjustment layer. The darkness was painted in on the near side of the rocks and in the bottom corners.
- Almost there. Some flare surrounding the top opening was neutralized with another levels adjustment layer.
- Finally, the rocks still seemed to have a bit of a purple tinge to them. A hue and saturation adjustment layer eliminated that.
So, that’s it. Noise in the sky was no longer an issue because that exposure was metered off the sky in the first place. Noise in the shadows was pushed into darkness by levels and desaturation adjustment layers. The rest of the cave interior is so textured that noise is hidden. Sharpening does not seem to be required.
After many failed attempts to process these RAW files over the year since I captured them, I am finally happy with the outcome. Please let me know what you think. After all, we are all fellow pilgrims on this quest to capture extreme light.

Leave a Reply