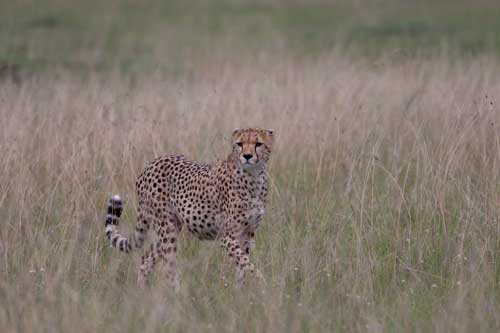
The light was failing. Dark clouds were moving in blocking even the most determined rays of light from the setting sun. For two cheetah brothers out hunting with their mother this was not a problem, but it was pretty poor light for dynamic wildlife photography. Sure enough, the unedited RAW file looked pretty bland.
The Vision
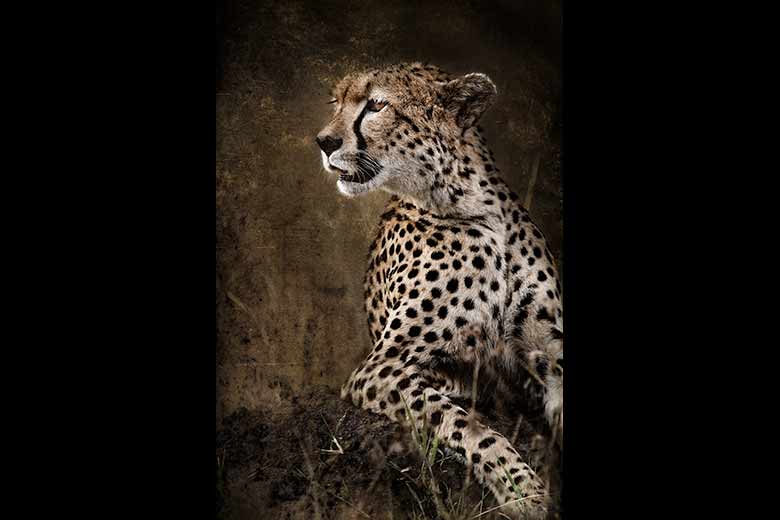
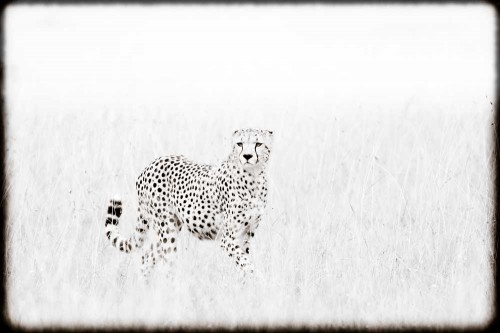
My creative vision of the African bush strives and strains to diminish distractions and visual clutter in order to reveal the animal in a more powerful way. In this case I envisioned the cheetah prowling through the tall grass of its world with its characteristic spots, tail tuft, and tear-stained eyes clearly revealed.
The Process
 The first step in Lightroom was to tweak the color balance and brighten the exposure quite a bit. The image was now pretty washed out, but the black slider brought back the darkest portions of the image which in this case were all the important bits – spots, tail tuft, eyes, and nose.
The brightness slider further washed out the brighter tones and the clarity slider brought back more distinction to the details of the cheetah. The increase to the contrast slider made the image pop a little more.
The next step was to convert the color image to black and white. Since I wanted the cheetah to stand out from its surroundings I needed to increase the contrast between the greens of the grass and the orange of the cat.
I like adding a little bit of warmth to the shadows in an image like this. I have created my own spit-tone preset so that collections of my images will match each other in color tonality if they were ever to be displayed together. The RGB color space does not render warm earth tones very well. It is difficult to generate a warm brown out of red, green, and blue. To arrive at the hue value of 41 I started with the saturation at 100 and then fiddled with the hue until the color seemed to match the African savannah. Then I backed off the saturation so that just a hint of it was revealed in the the shadows. I have chosen to leave the highlights neutral and the balance between the highlights and shadows at zero.
The upper third of the image was still too dark for my liking, and the separation of the orange and yellow sliders in the black and white panel had introduced some blotchyness and excessive grain. To tone these undesirable aspects down I used the graduated filter with the exposure set to -4.0. I dragged the filter over the top third of the image which completely wiped out the ugliness.
 To achieve the burned edges I employed another one of my favorite Lightroom presets. This one a created using the Post-crop Vignetting panel. Again I have this saved out as a preset so that I can call on it to add a consistent border with all images in this collection. The highlight priority mode rendered the nicest edge effect, but the bright highlights in the upper part of the image nearly wiped out the edge effect.
To bring back those edges I used a feathered adjustment brush with an exposure set to -2.8 to brush burnt edges into the washed out areas. While I was in the adjustment brush panel I used another brush to brighten up the cheetah’s eyes.
That’s it; start to finish. Let me know what you think, and of course feel free to ask any questions that arise from this edit. I will do my best to find answers for you. And please, if you found this at all helpful, share it with your social media of choice using the buttons below.


Leave a Reply